Raspberry Pi にインストールしたCentOSでVNCを使ってみます。
VNCサーバインストール
yumでVNCサーバをインストールします。以降、基本rootユーザで作業します。
# yum install tigervnc-server
設定ファイルの作成
以下にテンプレートがあるので、複製して設定ファイルを作ります
# cd /lib/systemd/system
# cp vncserver@.service vncserver@:2.service
@:の後の数字はディスプレイ番号。好きな数字でOK
設定ファイルを編集します。といっても、USERを変えるだけ
# vi vncserver@:2.service
# The vncserver service unit file
#
# Quick HowTo:
# 1. Copy this file to /etc/systemd/system/vncserver@.service
# 2. Replace <USER> with the actual user name and edit vncserver
#    parameters in the wrapper script located in /usr/bin/vncserver_wrapper
# 3. Run `systemctl daemon-reload`
# 4. Run `systemctl enable vncserver@:<display>.service`
#
# DO NOT RUN THIS SERVICE if your local area network is
# untrusted!  For a secure way of using VNC, you should
# limit connections to the local host and then tunnel from
# the machine you want to view VNC on (host A) to the machine
# whose VNC output you want to view (host B)
#
# [user@hostA ~]$ ssh -v -C -L 590N:localhost:590M hostB
#
# this will open a connection on port 590N of your hostA to hostB's port 590M
# (in fact, it ssh-connects to hostB and then connects to localhost (on hostB).
# See the ssh man page for details on port forwarding)
#
# You can then point a VNC client on hostA at vncdisplay N of localhost and with
# the help of ssh, you end up seeing what hostB makes available on port 590M
#
# Use "-nolisten tcp" to prevent X connections to your VNC server via TCP.
#
# Use "-localhost" to prevent remote VNC clients connecting except when
# doing so through a secure tunnel.  See the "-via" option in the
# `man vncviewer' manual page.
[Unit]
Description=Remote desktop service (VNC)
After=syslog.target network.target
[Service]
Type=simple
# Clean any existing files in /tmp/.X11-unix environment
ExecStartPre=/bin/sh -c '/usr/bin/vncserver -kill %i > /dev/null 2>&1 || :'
ExecStart=/usr/bin/vncserver_wrapper <USER> %i
ExecStop=/bin/sh -c '/usr/bin/vncserver -kill %i > /dev/null 2>&1 || :'
[Install]
WantedBy=multi-user.target
/* 上記の <USER> をVNCサーバを立てるユーザ名に変更 */
ファイアウォール設定
VNCのサービスをファイアウォールで許可します。
# firewall-cmd --add-service=vnc-server --permanent
# firewall-cmd --reload
ユーザ設定
一旦VNCサーバを立てるユーザに切り替え、パスワードを設定します
# su ユーザ名
# vncpasswd
Password:
Verify:
Would you like to enter a view-only password (y/n)? n
/* 最後の質問は表示専用のパスワードが必要か聞かれるので n 応答 */
VNCサーバ起動
systemctlでVNCサーバを起動します。
# systemctl start vncserver@:2
/* 初回だけかもしれませんが以下のような入力を求められたら設定したパスワードを入力 */
==== AUTHENTICATING FOR org.freedesktop.systemd1.manage-units ===
Authentication is required to manage system services or units.
Authenticating as: Sirius (sirius)
Password:
==== AUTHENTICATION COMPLETE ===
一応ステータスを確認
# systemctl status vncserver@:2
Active: active (running) であればOK
自動起動も設定します
# systemctl enable vncserver@:2
動作確認
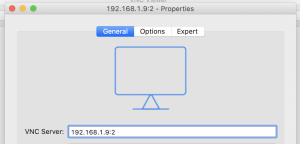
クライアント側は、(サーバアドレス):(ディスプレイ番号) で接続します。

この図の場合は
サーバアドレス:192.168.1.9
ディスプレイ番号:2
となります。

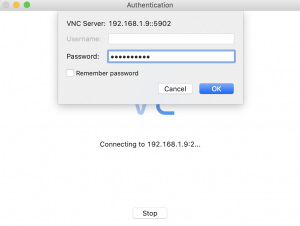
設定したパスワードを入力して、OKを押下

接続できました!
著者について